This page is for general tips and tricks on how to win field battles.
Before the battle itself, however, if reinforcements are present on your side (even a weak garrison or a single Lord) you’ll have the option to choose whether or not to Control Large Armies; unticking this feature is sometimes overlooked by new players but it may allow you to deal with enemy forces in waves (units enter the battlefield when others are wiped out or have left after routing) instead of facing up to 40 units all at once – potentially turning a difficult engagement into an easier one, since you’ll be less likely to be quickly overwhelmed especially if your reinforcements are significantly weaker than the enemy’s.
Also, given how the AI behaves in different circumstances, it is safe to assume that with a few notable exceptions like ambushes, it is better to be the attacker.
Besides being able to use Lightning Strike if needed, if the AI is the attacker it will immediately move against you, whereas if it is defending it will be more prone to wait for you to inflict damage upon them, giving you the opportunity to perform certain actions like wasting enemies’ ammo (to be added).
Finally, notice that although presented separately for exposition purposes, the tactics below are ultimately practical tips to use your Balance of Power effectively, and can most of the times be applied simultaneously to ensure the greatest chance of victory.
Defeat in Detail
While many military strategies don’t work in Total War due to limitations of the game engine, defeat in detail is a key tool for Total War tactics. Simply construed, defeat in detail is the idea that you can win against an equal or superior force by maneuvering to achieve multiple smaller, asymmetric engagements in which you outnumber or otherwise outmatch them. Here’s an example, inspired by the tactics of Alexander the Great:
Many effective Total War strategies are effectively just ways to defeat the enemy in detail, so mastering this tool will drastically improve your abilities as a commander.
Using Maneuverability
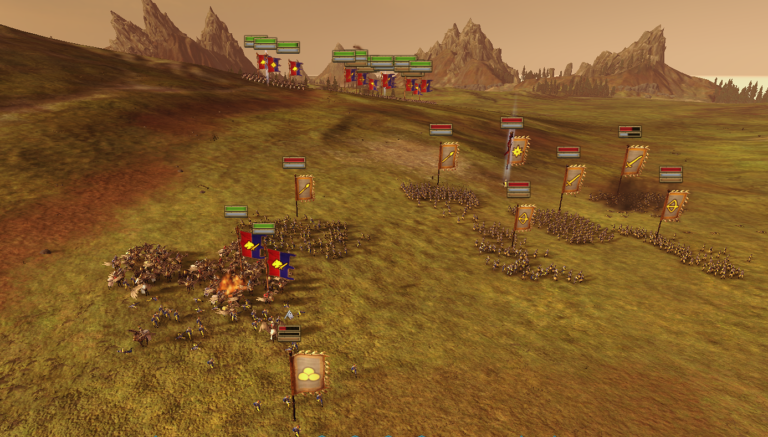
Although the AI attempts to keep its units in formation, it doesn’t make intelligent decisions about how to split its army. If your army has access to fast units, especially flying units, you can use them to great tactical effect by exploiting this blind spot. The backbone of this technique is splitting the enemy army to isolate high-value targets, allowing you to engineer asymmetric engagements. Here are some of the main ways to do it:
- Enemy ranged units tend to stay put when in firing range, while their melee units keep advancing. For example, in the above picture, the Empire army left their mortars behind the main force, creating an opening for the Bretonnian pegasus knights to swoop in and rout them before the infantry could double back.
- If your units are generally faster than your opponent’s (whether because you’re playing a speedier faction like Bretonnia or your opponent is a slower faction like Dwarfs), constantly repositioning around the map will spread out the enemy army due to the cumulative effect of small differences in unit speed.
- If you split your army, the AI will split theirs. The best use of this technique is using a single unit to distract multiple enemy units, leaving your main force better able to handle the remainder. This technique comes in handy when working with an army like the Skaven Weapons Team doomstack that prefers to hold its ground.
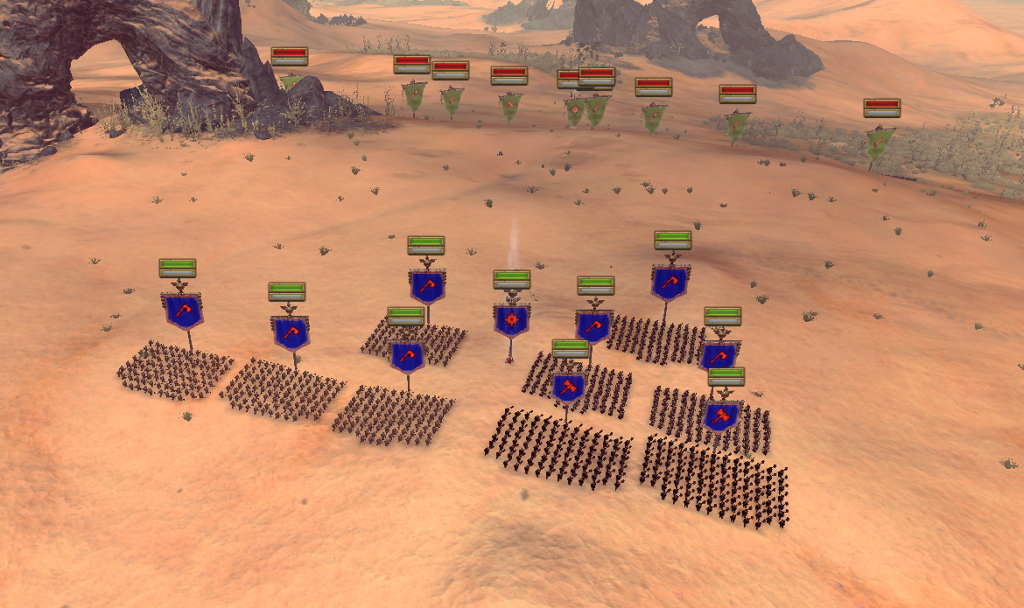
Checkerboard formation
Deploy your units in a checkerboard formation. Each unit should be stretched just enough to form a square to increase its depth, resulting in a higher resistance to charges. Additionally less units will be engaged in meele giving your archers more time to shoot. Make sure to place the less valuable units in front, to lose less balance of power if they get destroyed and to allow the more powerful shooters to use more of their ammo and inflict maximum damage (see figure).
You can quickly do it as follows:
- Select your units, eventually using Shift+Left Click
- Deploy them on two parallel lines, dragging just enough to produce squares
- Select alternating units while holding Ctrl to allow multiple selection
- Hold Tab and drag the alternate selection forward or back to produce the Checkerboard
- Adjust to fine-tune your formation, for example by turning the units on the flanks to face slightly outwards in order to better deal with flanking units.
Checkerboard formation has the following advantages:
- Missile units further back will be more protected and will be able to keep firing for longer, as you present a narrower front to the enemy
- Units will be more likely to have a clear line of sight on the flanks of the enemy units fighting the comrades in front
- Square formation makes easier for units to turn (the models on the edges have less ground to cover while the unit rotates) so they can change fire angle quicker
Checkerboard formation presents the following potential drawbacks:
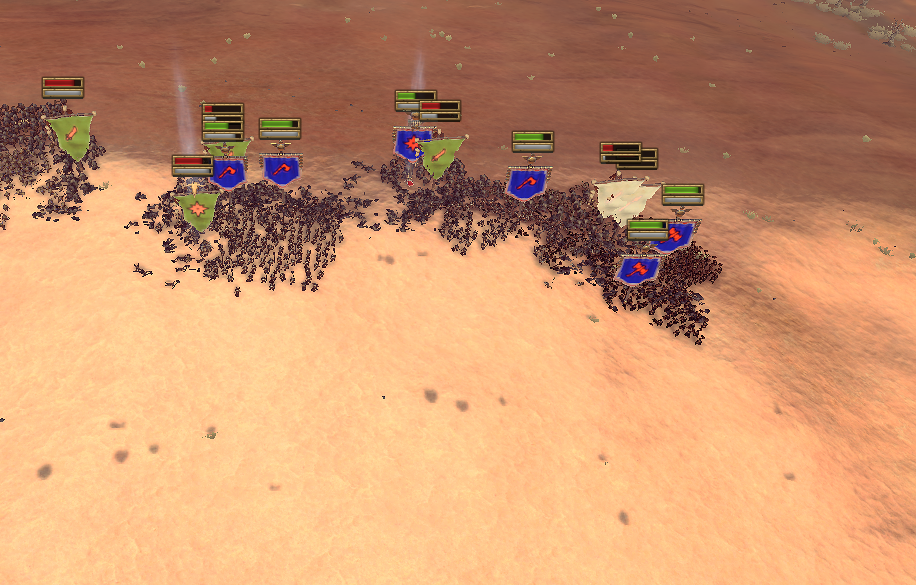
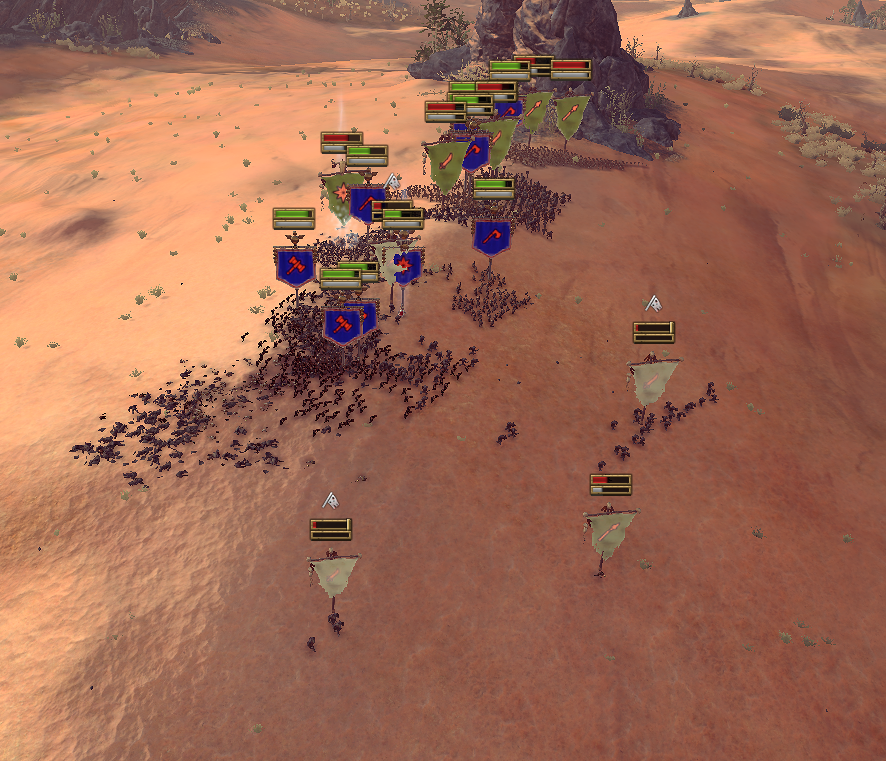
Corner Camping
Again, if you’re using a missile-focused army (a choice generally recommended for most races, especially on higher difficulties), you might be faced by an army that could easily flank and overwhelm you.
A solution to this is to choose the most suitable corner on your side of the map (ideally, the one with flat terrain and no trees, because different altitude affects accuracy while trees may block shots) and deploy close to it, often using a Checkerboard formation (see above) shaped like a triangle to fit into that corner.
As the battle starts, you immediately move your army to occupy the corner of the map, making sure that some melee units (spearmen, heroes, etc) are in contact with the map’s edges to block the way towards your back ranks; this way your flanks will be naturally protected, forcing the enemy to push through your frontline. This allows your missile units in the back to keep firing for longer instead of being engaged by flanking cavalry and forced to stop shooting before they’ve had the chance to use their ammo and dish out damage.
If you have artillery units, you can deploy them already facing the chosen corner of the map, to save the time it takes to turn them before moving.
This deployment tactic is particularly effective alongside Using Maneuverability (above) to further split the enemy forces, and it also tends to create blobs of infantry that can be profitably targeted by area spells.